Experiment in small spaces | Part 2
The centrepiece of the show is a bed. The plan is for the bed to fit a 140x200cm.
To approach the design process I scouted the internet for existing designs and tried to understand the elements of a high-quality product. It became clear that hinges and fittings played a big role in creating a seamless experience. Secondly, the visual appearance which differentiated a well-designed bed from a second-class alternative to a normal bed.
For me, it was important to be pragmatic about my choices and keep things stupid, simple. It realised that just taking on this project with no guidance is already a challenging endeavour.
I’m wary of the over-engineering culprit, that is when too much focus is put on specific constraints while disregarding others. Put simply, it’s when you’ve solved problems that no user is worried about while introducing new unpleasant ones, most notably unnecessary complexity.
Visual simplicity might be at odds with structural simplicity. Making something seem visually simple could take a lot of tricks behind the scenes.
Being also a technical guy, I quickly found myself attracted to yet another unexplored landscape of gas spring pistons and hydraulic dampers.
These are essential because they will create a feeling of safety and stability to the bed. No noisy rusted springs that give the discomforting feeling of things going wrong.
Going back a step, there are two problems that need to be addressed:
- A rotation mechanism — This will some component that allows circular rotation. Most likely an axel or bearing of sorts. Should accommodate for 90° of rotation. This one must be load bearing as it is to carry the mattress and mattress frame.
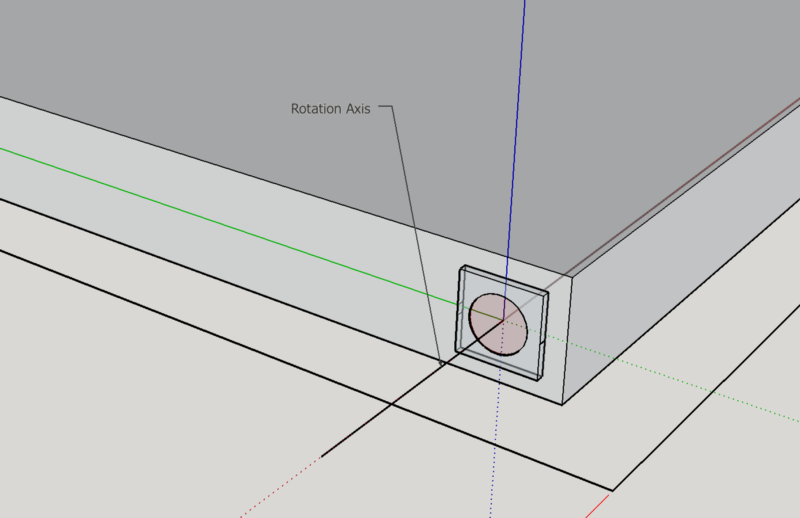
The centre of the circle is where the axel is envisioned
- Damping mechanism — This should resist the immediate falling (slow down release) and smoothen the “landing” of the mattress frame. Additionally, this should assist in raising the bed back to its vertical position.
I searched the web meticulously to resources and ideas. Commercial Murphy bed kits which cost around 300 USD for just the mechanism. So any viable cheaper alternative would allow me to reduce the production cost to a substantial degree.
I finally found heavy duty chair swivels with a load rating of 200kg. Two of them will be fixed vertically on each side of the mattress frame. This idea came from the Youtube channel DIY Creators. Because the damping mechanism is not mandatory, I’ll leave that decision to when the bed will have been constructed and I can better understand where the pain points lie.
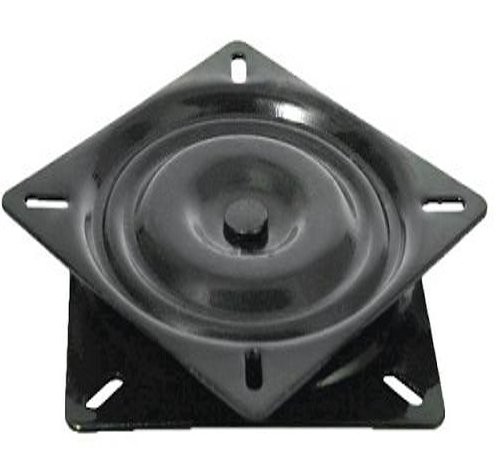
Chair swivel
To be able to design everything to accurately to size, I decided to 3D model the bed on Sketchup.
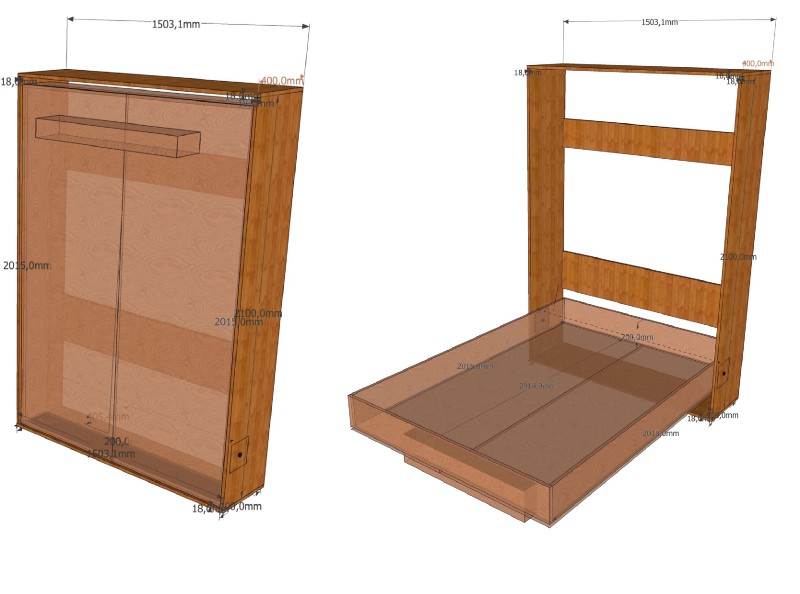
The bed consists of a base which I’ll fix to the wall and a mattress frame that moves 45 degrees. A shelf will be built as the leg for the mattress frame. A slatted frame will also be integrated to keep the mattress ventilated. Additionally, a couple elastic straps will be used to prevent the mattress from coming out of the frame when closed.
I spent time researching bed heights. The rule of thumb is to allow your knees to be 90° when sitting. I settled on 41cm from the floor with some extra space for the mattress to stick out of the mattress frame.
As for material, I initially considered edge glued beech panels which are very affordable and give a lovely end result. Because edge glued panels have the grain running in only a single direction, they are structurally strong in only one direction. In contrast, plywood has every sheet in alternating grain directions. This makes it structurally sound in both grain directions. Plywood is also dimensionally stable, unlike edge glued panels. So I decided to use 18mm birch plywood. All the insights are from the fantastic stack exchange woodworking network.
In the next part, I’ll talk about the construction process.