Experiment in small spaces | Part 3
The woodworking world is constantly changing. The democratisation of power tools, invention of new techniques, and usage of new materials has expanded the range of possibilities.
Traditional woodworking is an art that involves no metal. That’s achieved by honing the natural properties of the wood to achieve strength and structural integrity.

Because wood is one the oldest building materials, almost every culture and civilisation that relied on wood developed its own joinery techniques.
Joinery
Joinery is the activity of joining two pieces of wood, like the legs to a table, the sides of a picture frame, or the faces of a cabinet. It is one of the fundamental building blocks of woodworking and is in subtext every design decision. Different joinery techniques have different strength.
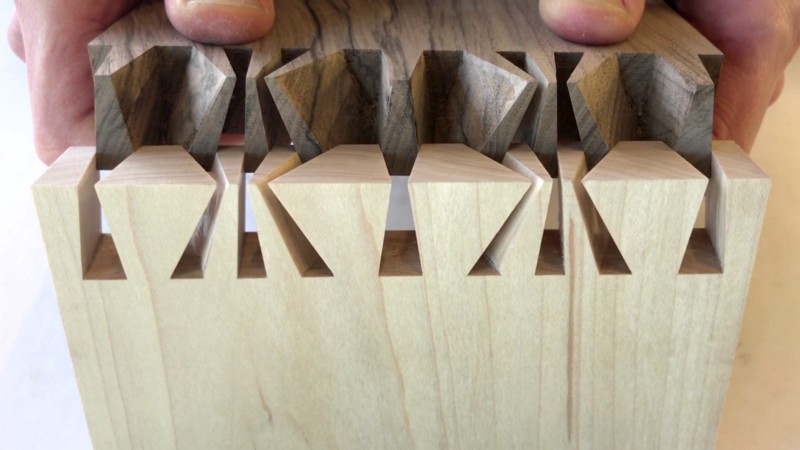
A difficult hand cut dovetail joint
Probably the most significant change in one of the oldest crafts is the invention of many new time saving joinery techniques.
Hand cutting a dovetail join as in the picture above can be a meditative task which allows the woodworker to transcend the body mind duality. It’s also a beautiful feat and one the strongest joints due to two properties of the joint:
- Increased total joining surface area of the two pieces.
- Angles preventing the joint from coming or being pulled apart. In woodworking jargon it’s called tensile strength.
Applying knowledge to constraints
I decided to forgo dovetails due to a couple of a reasons. As much as I love the aesthetic of dovetails, cutting them by hand requires mastery. There are special jigs that allow creating dovetails with a router (a type of power tool). However, this felt like an overkill for my purposes. So I quickly let go of this idea.
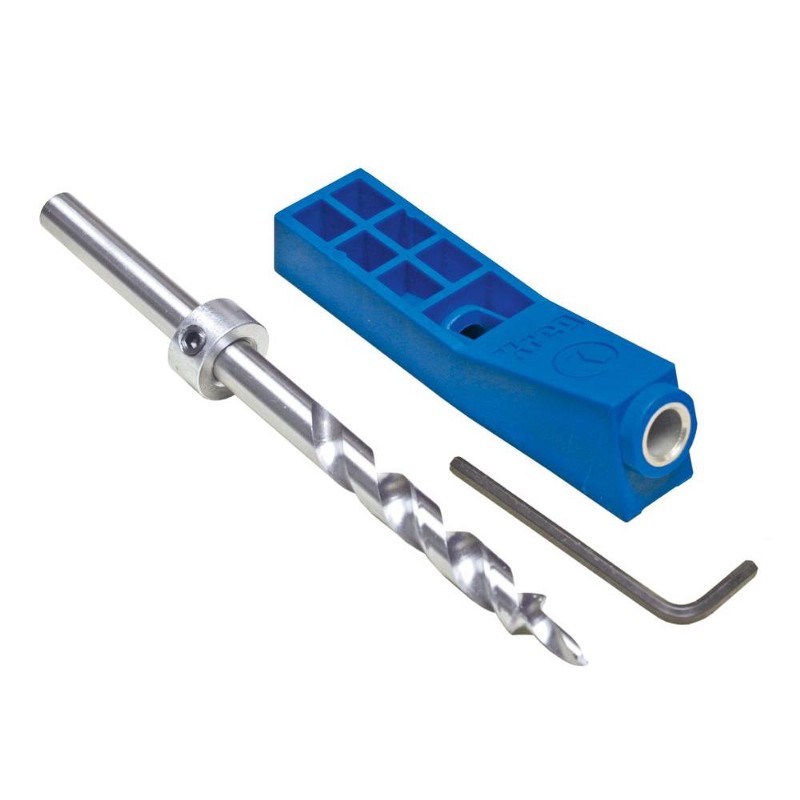
The jig which helps drill at 15°
The most pragmatic alternative is a pocket hole joint. A special tool is used to drill a hole at a 15° angle through which the screw is fastened to joint the two pieces of wood. Normally, pocket hole joints are glued too, to ensure the joint is snug as humidity and temperature cause the wood to expand and shrink.
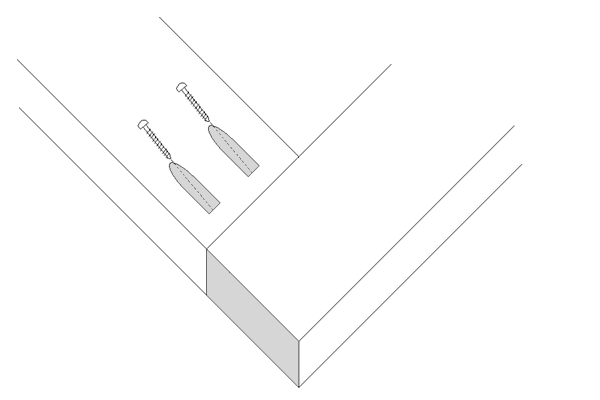
Typical pocket hole
knock-down joints
Pocket holes are not a knockdown joint, that is a joint that can be disassembled.
Knockdown joints are something most reader would be familiar with thanks to the small furniture manufacturer IKEA that popularised them with their flat pack furniture.
If the bed is ever to leave the room, it must be disassemblable. This research challenge was characterised by a two day internet rabbit-hole that felt like a trap that ends with 50 tabs in my browser and more questions than answers and strange dreams with Alice in the wonderland. Let alone sourcing the fittings and putting this to practice.
The most commonly used is the cam lock nut. I’m too familiar with this fastener technology to use it. The advantage is that it only requires a screwdriver to assemble. Be that as it may, they have several drawbacks. The cam screws protrude out from the threading that fixes them. That makes them a force multiplier. In physics, this is called a mechanical advantage. Practically this means that a small hit during assembly can cause damage to the wood rather than the fitting; rendering the wood section potentially useless.
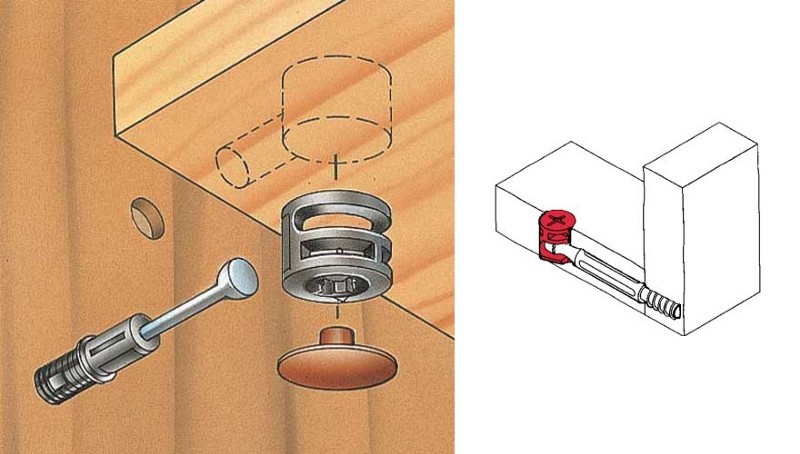
Standard cam lock nut and cam screw fastener.
High-tech Modern Alternatives
Festool, a fine German tool manufacturer has a tool called Domino which helps create mortise and tenon joints. Recently, they released knockdown connectors that are compatible with the system. Unfortunately, they’re ridiculously expensive. I can’t justify buying the domino tool and the connectors.
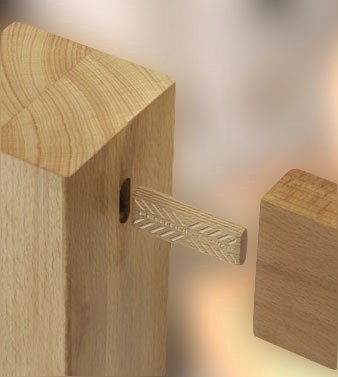
Normal domino dowel rods for gluing
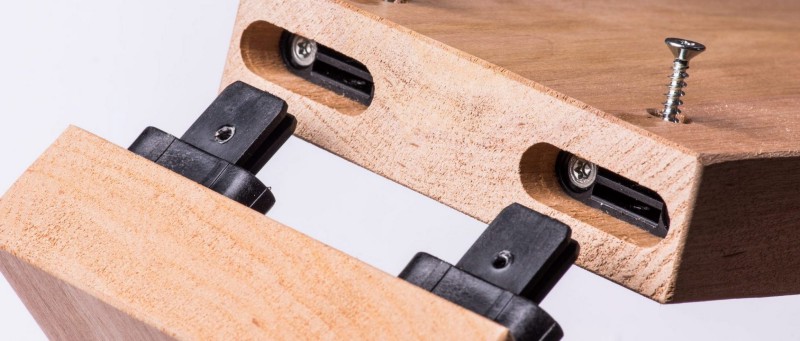
Festool Domino knockdown connectors
Affordability and functionality with cross dowels
The rabbit hole rewarded me with an old gem. The book titled Exercises in wood-working published originally in 1889 covers another knockdown fastener. While slightly different than the modern variant called a cross dowel. The underlying principles are the same.
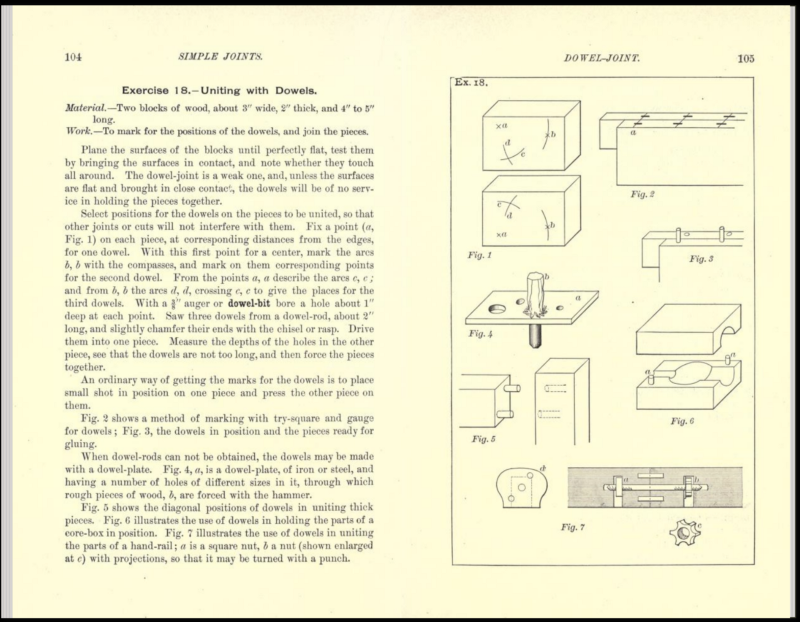
Figure 7 visualises what is today called a cross dowel
Cross dowels are extremely versatile and inexpensive.
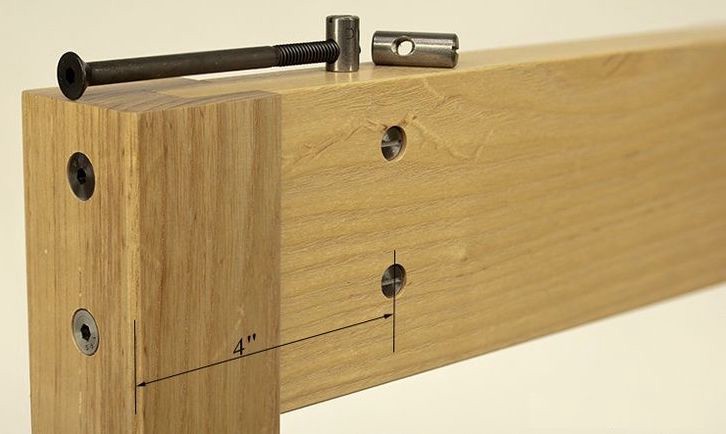
Cross dowel
Talk is cheap; show me the goods
I ordered some cross dowels and screws and ran a couple of experiments.
The first challenge I was confronted with was drilling perpendicular holes with no drill press. I try to keep the my workshop as lean as possible but this seems to be a hurdle I run into repeatedly. There are some drill attachments that help with this. I tried one of them and still had trouble.
More importantly is building on a strong foundation. The first test resulted in an extremely strong joint. Though not perfectly aligned due to the drill guide slipping while clamped, I’m very happy with the first experiment.
A drill press or some other clever solution (as I’m writing I’m thinking about building a jig for my plunge router to do just that) could solve the alignment problem and make the holes immaculate.
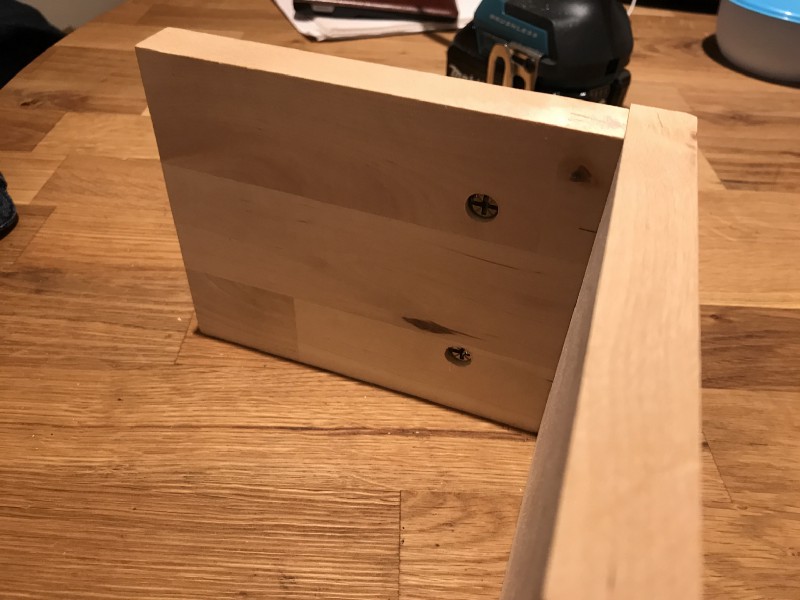
The cross dowel
A counter sunk hole for the screws. This can be covered with a cap to conceal
Potential solutions for concealing the screw
Summary
Learning a new craft and expanding one’s toolset is a process. My polymath artist friend Tim reminded me that the important part is to clock hours in the workshop.
“There is no losing in jiu jitsu. You either win or you learn.” — Grand Master Carlos Gracie Sr.
I think this aphorism applies to design too. I may be wrong or confused about many of the ideas that I’m applying. I don’t have a formal education in any of these disciplines. But I’m dedicated to pushing the envelope, creating something new, structurally sound, and functional. Almost always, that involves letting go of pre-conceived notions.
My friend Matt reminded me:
“Fall in love with the problem, not the solution”
I’m not quite there yet. Like any creative process, I hit low points and disillusionment. Writing about the process reminds me it’s a journey.
Follow along to partake in the integration of these ideas and technologies into a cosy bed.